AI on demand: Configuring OpenCode Terminal: Difference between revisions
No edit summary |
|||
| Line 3: | Line 3: | ||
[https://opencode.ai OpenCode] is an open-source AI coding agent, available as a desktop application, in the browser or via the terminal. It supports tool calls, MCP servers, skills, plugins, etc. for software development workflows. OpenCode can be configured to exclusively use AI models hosted by [https://www.stepping-stone.ch/en/products/artificial-intelligence stepping stone AG] via its OpenAI-compatible API. | [https://opencode.ai OpenCode] is an open-source AI coding agent, available as a desktop application, in the browser or via the terminal. It supports tool calls, MCP servers, skills, plugins, etc. for software development workflows. OpenCode can be configured to exclusively use AI models hosted by [https://www.stepping-stone.ch/en/products/artificial-intelligence stepping stone AG] via its OpenAI-compatible API. | ||
'''Note:''' This guide walks through configuring the terminal variant of OpenCode. If you are looking for guidance on setting up the terminal version of OpenCode, see [[AI on demand: | '''Note:''' This guide walks through configuring the terminal variant of OpenCode. If you are looking for guidance on setting up the terminal version of OpenCode, see [[AI on demand: Configuring OpenCode Desktop]] | ||
The following steps describe how to create a basic OpenCode setup using models provided by stepping stone AG, and some good first steps to control and extend the agents capabilities. | The following steps describe how to create a basic OpenCode setup using models provided by stepping stone AG, and some good first steps to control and extend the agents capabilities. | ||
Latest revision as of 16:06, 3 November 2026
Overview
OpenCode is an open-source AI coding agent, available as a desktop application, in the browser or via the terminal. It supports tool calls, MCP servers, skills, plugins, etc. for software development workflows. OpenCode can be configured to exclusively use AI models hosted by stepping stone AG via its OpenAI-compatible API.
Note: This guide walks through configuring the terminal variant of OpenCode. If you are looking for guidance on setting up the terminal version of OpenCode, see AI on demand: Configuring OpenCode Desktop
The following steps describe how to create a basic OpenCode setup using models provided by stepping stone AG, and some good first steps to control and extend the agents capabilities.
Prerequisites
- A valid AI on Demand API key.
- Network access to
https://llm.stoney-cloud.com/v1 - The ID of the AI models you wish to use with OpenCode (e.g.
- Optional: Node.js 20 or newer if you intend to install opencode via npm.
Installation
Use your JavaScript package manager of choice to install the terminal variant of OpenCode:
npm install -g @opencode/cli
# or
bun install -g --trust @opencode/cli
# or
brew install anomalyco/tap/opencode-v2
See https://opencode.ai/v2/docs for further information on how to install OpenCode.
Verify that the installation was successful by starting OpenCode:
opencode --version
opencode
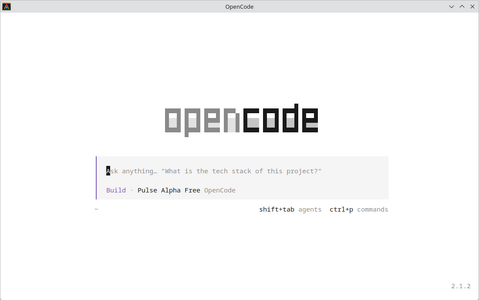
OpenCode Terminal

Configure provider and models
To configure stepping stone AG as your provider, you must modify your OpenCode configuration file to include the following:
{
  "$schema": "https://opencode.ai/config.json",
  "providers": {
    "stepping-stone": {
      "name": "stepping stone AG",
      "package": "@opencode/ai/providers/openai-compatible",
      "env": ["STONEY_KEY"],
      "settings": {
        "baseURL": "https://llm.stoney-cloud.com/v1"
      },
      "models": {}
    }
  }
}
On Linux machines, the default location of your personal configuration file is ~/.config/opencode/opencode.jsonc or equivalent. See https://opencode.ai/v2/docs/config/#locations for more information on where to place the configuration file on your system.
Note: When configuring stepping stone AG as your provider as above, OpenCode expects to find your API key in an environment variable called STONEY_KEY. Alternatively you may add your key directly to the configuration file by removing the "env": ["STONEY_KEY"], line, and adding your key as follows:
...
      "settings": {
        "baseURL": "https://llm.stoney-cloud.com/v1",
        "apiKey": "YOUR API KEY GOES HERE",
      },
...
Next, you should configure at least one model you wish to use with OpenCode. The following is a configuration for the GLM-5.3-Flash model provided by stepping stone AG:
...
      "models": {
        "zai-org/GLM-5.3-Flash": {
          "name": "GLM 5.3 Flash",
          "limit": {
            "context": 262144,
          },
          "cost": {
            "input": 0.3,
            "output": 1.5,
            "cache": {
              "read": 0.045,
            },
          },
        },
      }
Replace zai-org/GLM-5.3-Flash with the ID of the particular model you wish to use, and refer to https://www.stepping-stone.ch/en/products/artificial-intelligence for pricing and context window limits. Additional model specific configuration can be added as needed. See https://opencode.ai/v2/docs/models/ for further information on configuring models.
To check if your configuration is correct, restart OpenCode after changing the configuration file. If the configuration is correct, you should be able to select the newly added model hosted by stepping stone AG from the list of available models. You can open a selection of all models available to you via the shortcut CTRL + X, m. You may need to scroll to the end of the displayed list.
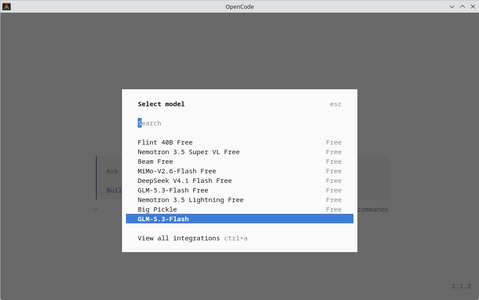
Model selection menu

Finally, select the newly added model, then enter a first prompt to test that the model is working correctly.
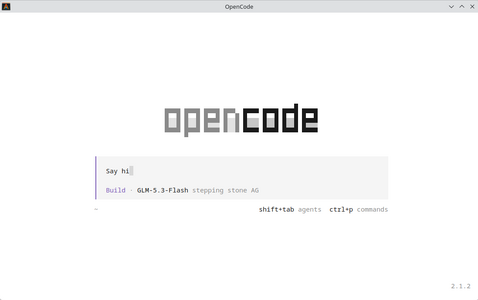
Enter an initial prompt
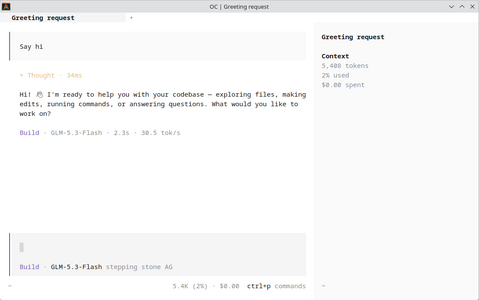
Check that you receive a response


The following is a list of useful shortcuts to get started with using OpenCode:
CTRL + P: Open the main menu to interact with the agent, manage sessions and MCP servers, configuration, theming, etc.CTRL + X/N: Open a fresh session.CTRL + X/L: Switch to another existing session.CTRL + X/W: Close the current session tab.CTRL + X/M: Switch the current model.CTRL + X/A: Switch the current agent mode.CTRL + X/Q: Quit OpenCode.CTRL + C: Clear prompt input field.
Permissions
OpenCode provides a built in sandbox to limit what actions an agent is allowed to perform. You can configure permissions via the configuration file (there is currently no option to configure permissions via the user interface). Permissions are defined as a list of rules. For each action (e.g. read/write a file, execute a shell command, etc.), you may define a set of rules, each with a pattern determining when the rule applies, and an effect to determine if the action is allowed, denied or requires explicit approval by the user. The following shows some examples of permission rules:
...
  "permissions": [
    { "action": "shell", "resource": "*", "effect": "ask" },
    { "action": "shell", "resource": "git status *", "effect": "allow" },
    { "action": "shell", "resource": "git push *", "effect": "deny" },
    { "action": "skill", "resource": "*", "effect": "allow" },
    { "action": "read", "resource": "*", "effect": "allow" },
    { "action": "edit", "resource": "*.html", "effect": "allow" },
  ]
...
Further steps
You now have a basic OpenCode agent setup available to you. You may further customise and extend OpenCode in a variety of ways, such as by adding skills, configuring MCP servers or OpenCode plugins.
Check https://opencode.ai/v2/docs/ to see how you can extend your configuration file to adapt your agent to your needs.